What we’ve learned from hundreds of Okanagan homes
We’ve done a lot of blower door tests over the years. Some homes sail through air tightness requirements on the first try. Others… not so much. The difference usually comes down to air barrier details – the spots where two materials meet, where penetrations pass through, and where the building envelope gets complicated.
The good news? Most air leakage problems are preventable with the right approach during construction. Here’s what actually works in the field.

The Big Picture: Think Continuous
An air barrier is only as good as its weakest link. You can invest in R-30 walls and triple-pane windows, but if air moves freely through your building assemblies, the home’s efficiency and performance will be significantly compromised. This is why we prioritize air sealing and rigorous testing; air leakage remains the number one contributor to energy loss in modern construction.
Homes that pass airtightness testing with ease share a common trait: a team that prioritized air barrier continuity from day one. Achieving this requires identifying the air barrier location and materials early, whether on the interior, exterior, or a strategic combination of both. Every project needs a dedicated airtightness layer, with a clear map of how that layer connects at every transition and assembly joint.
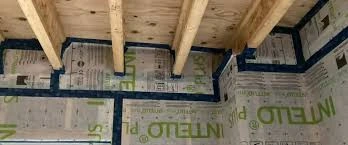
Detail 1: The Rim Joist
The rim joist is the horizontal board that sits on top of your foundation walls and connects to your floor joists. It’s also one of the leakiest spots in a typical home.
Several methods can effectively address these critical transitions. Rigid foam board can be custom-cut to fit each cavity and sealed at the edges with acoustical sealant. Closed-cell spray foam is another excellent option when applied under the right conditions. For traditional assemblies, batt insulation paired with poly or a smart vapor retarder works well, provided the sealant detailing is flawless. Modern alternatives also include liquid-applied membranes and high-performance specialty tapes.
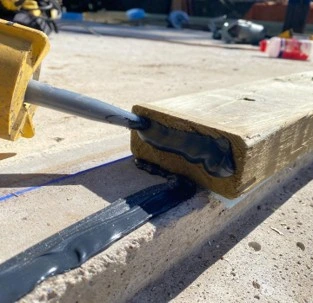
Regardless of the material, the priority is ensuring air barrier continuity around every rim joist (box end) and a robust seal at the foundation-to-subfloor transition. While an exterior air barrier strategy can simplify this detailing significantly, performance can also be improved during the framing stage. Applying sealant to both sides of the capillary break (sill gasket) is a high-impact move; because concrete surfaces are rarely perfectly smooth, this single junction can account for a significant percentage of total air leakage around the building’s perimeter.
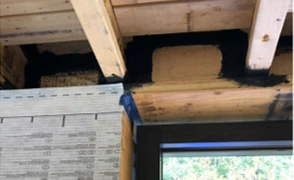
Common Pitfalls: One of the most frequent errors is applying spray foam in wet environments or unfavorable conditions, which prevents a proper bond. Equally common is simply stuffing batt insulation into the rim joist cavity and considering it complete. Because batt insulation is air-permeable, it does not act as an air barrier. This allows warm, moist indoor air to reach the cold rim joist surface where it can condense, leading to long-term rot and moisture issues. Ultimately, a lack of detail-oriented execution is the biggest risk; air is persistent and will find its way through even the smallest oversight.
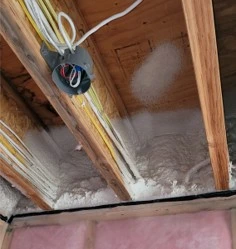
Detail 2: Electrical Boxes and Other Penetrations
Every hole in your air barrier is a potential pathway for air leakage. Recessed lights, electrical boxes, plumbing stacks, and ductwork passing through the envelope all need attention to detail to prevent air leaks.
What works:
- Surface-mounted light fixtures instead of pot lights in ceilings below attics
- Electrical boxes sealed to the drywall with putty pads or acoustical sealant
- Weatherstripped access panels
- Solid blocking and sealant where ducts or pipes pass through top and bottom plates
- Using proper gaskets for sealing penetrations rather than tape.

Pro Tip: When a home fails airtightness testing, the culprit is almost always a lack of attention to detail during the rough-in stage. We encourage builders and homeowners to emphasize the importance of precision to all trades on-site; slowing down to get the transitions right saves significant time and money in the long run. Air-sealing mistakes are simple to fix when caught early, but once they are hidden behind drywall and finishes, remediation becomes both challenging and expensive. We have often seen “inexpensive” insulation quotes evolve into nightmare scenarios where the cost to rectify air-leakage failures far exceeds the initial savings.
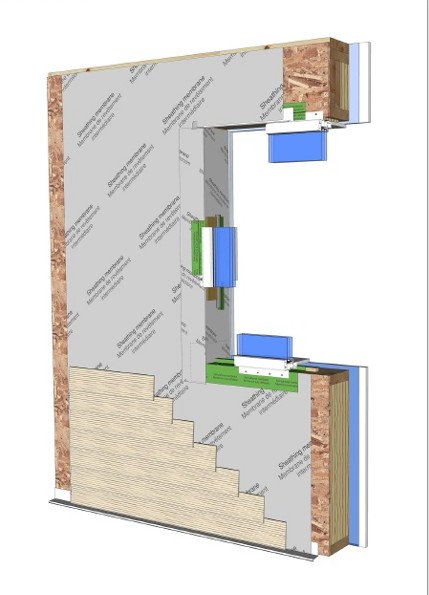
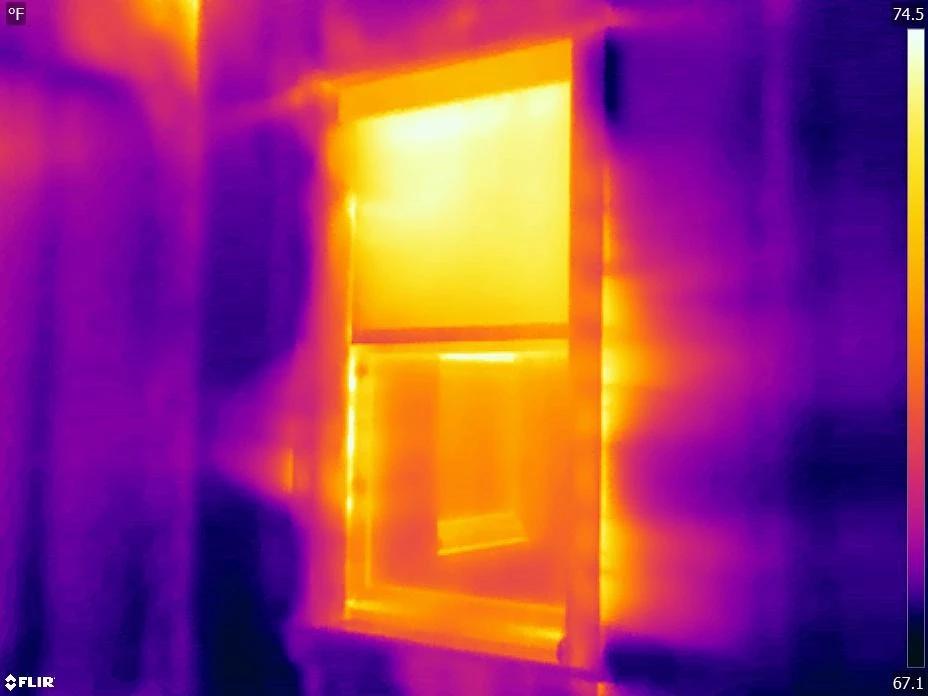
Detail 3: Windows and Doors
Windows and doors don’t only leak around the frames. They leak through the rough openings as well, if not properly sealed. In reality, it’s much more typical to see a window or door leak around the rough opening due to poor installation than it is to see the factory seal leak.
What works: A stepped approach at every opening following CSA A440
- Sloped sills or back daming
- Proper sill prep using compatable membrains and tapes
- Proper shimming and fastening so the unit sits square in the RO
- Backer rod first to control depth and then caulk, or low-expansion foam between the frame and rough opening (rod and caulk always outperforms spray foam)
- You want a positive lap for drainage when installing flashing and the WRB
- Flexible tape or membrane flashing that ties the window flange to your WRB, left open at the bottom for drainage
What to avoid: Stuffing fibrous insulation into the gap. It compresses, leaves voids, and doesn’t stop air movement.
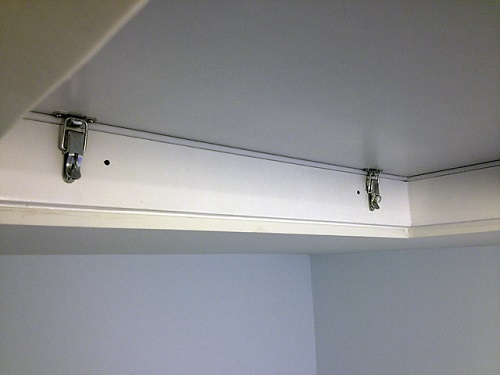
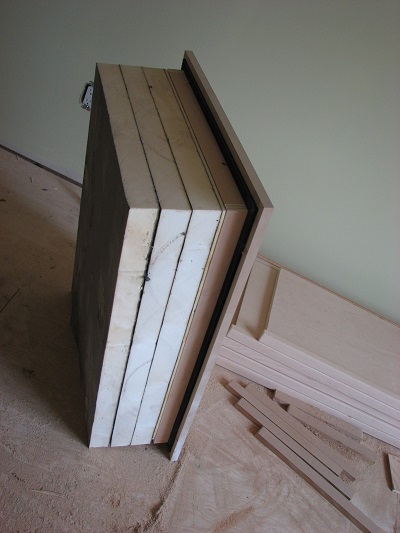
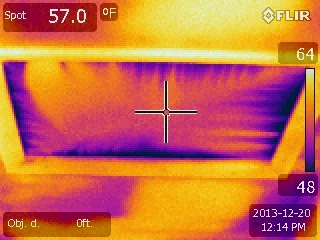
Detail 4: Attic Access and Penetrations
The attic hatch is often the single leakiest component in an otherwise tight home. The same goes for plumbing vents, chimney chases, and any wiring entering the attic.
What works:
- A weatherstripped attic hatch with rigid (or other) insulation on top and positive latches to ensure compression
- Sheet metal or rigid foam collars around chimney chases, sealed to the ceiling
- Sealed electrical boxes below the attic, with wiring run through sealed chase walls
Builder tip: If you’re using drywall as the attic hatch, use a one sided sticky foam gasket to create a sealing surface. This is especially important on a stippled ceiling.
Detail 5: Garage and Cantilever Connections
Attached garages with living space above and exposed floors create complex geometry where the air barrier has to change direction. These spots get missed or overlooked surprisingly often. Additionally, structural members that protrude from the interior to the exterior also require special attention.
What works: Detail these on your plans before construction starts. Show exactly how the air barrier transitions between the different assemblies, or how the cantilevered floor ties back into the main envelope. Then build and air seal to that specific planned detail.
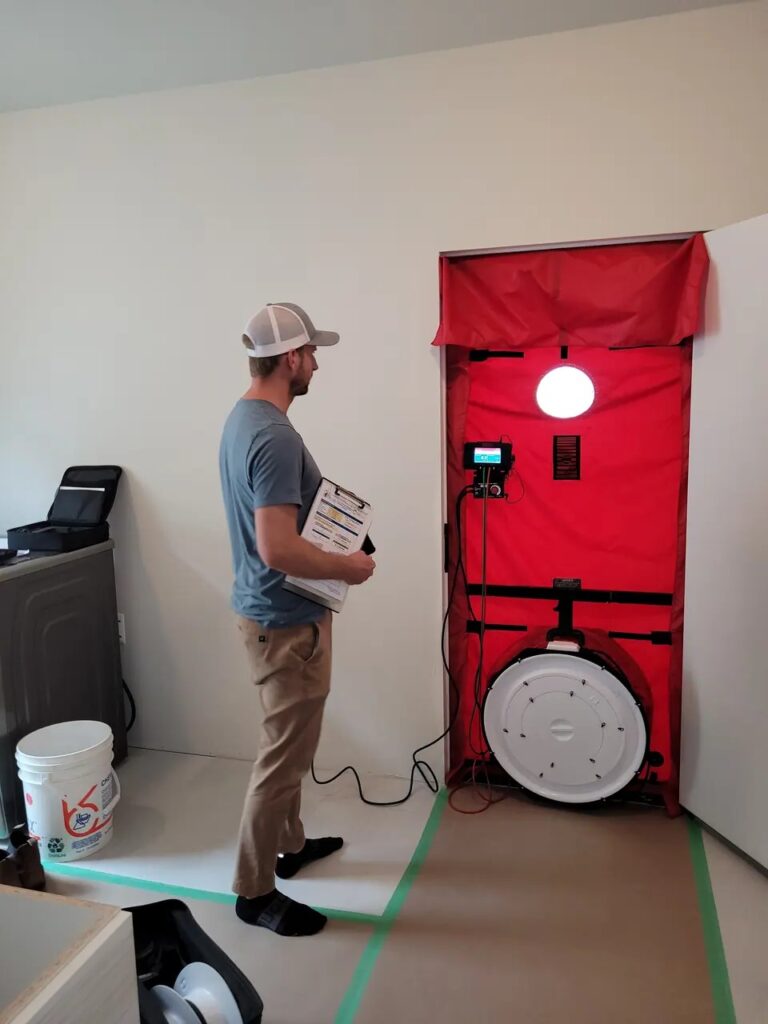
When to Test
Even with perfect details, things happen during construction. That’s why a mid-construction blower door test is critical before drywall goes up. This lets you find and fix leaks while they’re accessible.
For Step Code projects, this mid-construction test isn’t just helpful, but is often the difference between hitting your airtightness target smoothly or scrambling at final.
The Bottom Line
Passing a blower door test isn’t about perfection. It’s about consistency. The homes that perform well have airtightness details that are:
- Identified on plans before construction starts
- Reviewed with the crew so everyone knows where to focus
- Tested mid-construction while fixes are still easy
- Verified at final to catch the inevitable last-minute penetrations
We’ve seen many homes hit below 1.0 ACH50 on the first test. This isn’t because the builder spent a fortune on exotic materials. It’s because they treated airtightness as a system and thought through the transitions at every step.
Thrive Energy Inc. provides blower door testing and air barrier consulting for builders and homeowners throughout the Okanagan. Questions about your project? Get in touch.