Understanding How Pre-Construction, Mid-Construction, and As-Built Testing Work as part of the BC Energy Step Code Process
You asked:
“The city says I need a BC Energy Step Code Compliance Report from an Energy Advisor before I can get my building permit, this is the last thing I need — what does this process look like and how does it work?”
We get this one a lot from homeowners planning a new build or major renovation for the first time.
Let’s break it down.
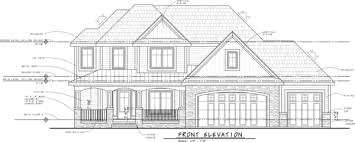
Step 1: Pre-Construction Modeling & Compliance Checklist
This is where your project’s energy performance plan begins. For information on our pricing – see our Blog Post on this.
Your Energy Advisor creates a digital energy model of your proposed design using NRCan-approved software. We enter details like:
- Geometry Details: Perimeter, area and volumes of all home components
- Wall, ceiling, foundation & floor insulation types levels (R-vaules)
- Window performance specs (U-values and SHGC)
- Heating, cooling, and ventilation systems capacity and efficiencies
- Domestic hot water heating system type and efficiency
- Air tightness target (your “blower door” goal) – 2.5 air changes per hour if going for Step 3 (required), 1.5 air changes per hour if going for Step 4 ($15,000 rebate available), 1.0 air changes per hour if going for Step 5 ($20,000 rebate available)
Once the preliminary energy model is complete, you’ll receive your Pre-Construction Compliance Report and Checklist — these are required for your building permit submission.
If the project, as planned, isn’t already meeting Step Code requirements, then we start to look at the most cost-effective and preferred options (by you and your builder) for improving the efficiency to meet the targets.
At this stage, we can also explore “what-if” options. For example:
- What happens if you upgrade to triple-pane windows?
- How much energy could you save by improving insulation values?
- Would that small change get us to Step 4 so we are eligible for rebate funding?
- What impact would it have on the home if we improved the air tightness?
It’s the perfect time to make tweaks that improve performance and unlock rebate funding before construction starts.
Step 2: Mid-Construction Blower Door Testing & Compliance Checklist
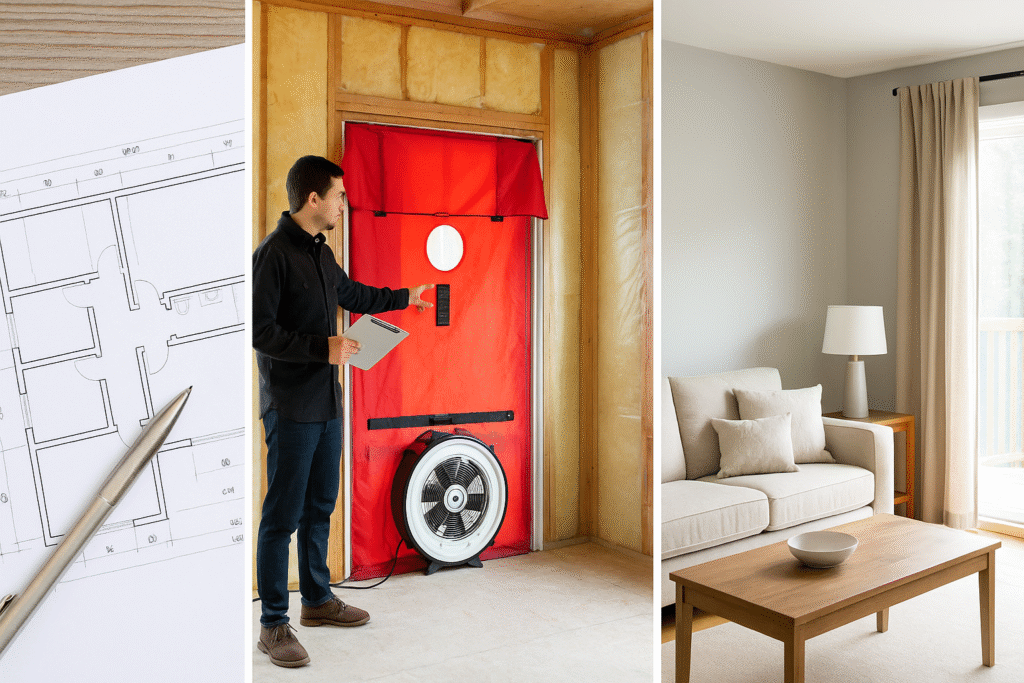
Once the home is framed, insulated and the air barrier is in place – but before drywall – we perform a blower door test to ensure the project is on target to pass. For pricing on this step, see our Blog Post.
This test measures how airtight the home actually is at that stage. Think of it as a “checkup” halfway through the build:
- We set up a calibrated blower door fan in a doorway to gently pressurize or depressurize the home depending on the loaction of the primary air barrier.
- The fan measures how much air leaks through the cracks, penetrations, and gaps in the building envelope. This is typically measured in ACH or air changes per hour.
- There are two other metrics available to pass code compliance as well. The NLA (normalized leakage area) and the NLR (normalized leakage rate), these two metrics take into account the actual exposed surface areas of the building rather than just the volume (such as in the ACH metric). This allows a variety of housing sizes and types to have a equal chance of passing air tightness testing.
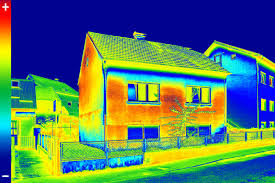
- We use diagnostic tools such as fog/smoke machines and thermal imaging cameras to find the leaks before it’s too late.
Then, we provide feedback right on site, so your builder or insulator can seal up problem areas before starting drywall installation.
We update the energy model with your real-world results and issue an updated Mid-Construction Compliance Checklist. This keeps you on track toward your Step Code target and ensures there are no surprises later. Mid-construction blower door testing is optional in some municipalities but we always highly recommend it. If air tightness targets aren’t reached at the As-Built stage, air sealing is much harder and more expensive to accomplish once the air barrier is covered up with drywall and finishes.
Step 3: As-Built Testing, Modeling & Compliance Checklist
Once construction is complete and all systems are installed, we return for the final blower door test and verification. Want to know what we charge for this? See our pricing Blog Post.
At this point, we:
- Re-confirm insulation, windows, and HVAC match the design specs.
- Perform the final airtightness test.
- Update the energy model with “as-built” details.

From there, we produce the official As-Built Compliance Report and Checklist — which you’ll need for occupancy.
But that’s not all.
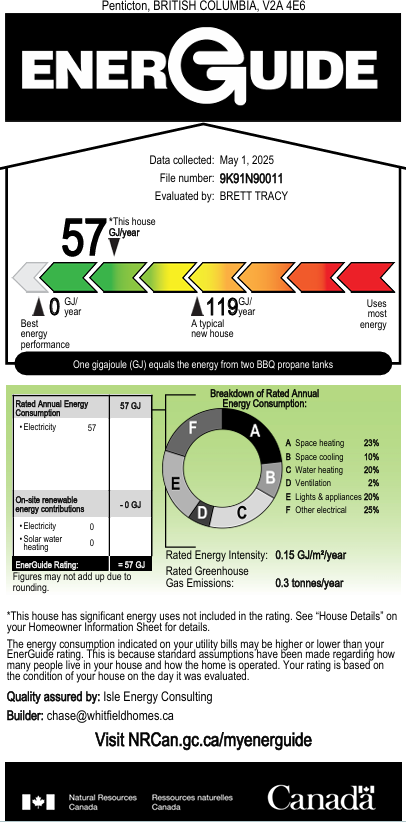
For homes built under the EnerGuide framework, you’ll also receive:
- Your EnerGuide Label, showing the home’s rated energy performance.
- A Homeowner Information Sheet summarizing the major components of your build and energy efficiency level.
These documents aren’t just paperwork – they become a part of your home’s efficiency record, useful for resale value and future upgrades.
So, What’s the Big Picture?
The BC Energy Step Code process might sound technical, but it’s really a structured way to verify that your home performs as designed and meets Energy Step Code Efficiency Requirements. We’re here to ensure a seamless process that looks our for you and the project. It doesn’t need to be to be a confusing or complex process.
Here’s a quick summary:
| Stage | Purpose | Deliverables |
| Pre-Construction | Model proposed energy performance before construction | Pre-Construction Compliance Checklist, Assembly Details, CSA F280-12 Heat Loss/Heat Gain Reports |
| Mid-Construction | Verify airtightness and construction components | Mid-Construction Compliance Checklist & Recommendations |
| As-Built | Confirm final performance and assembly details | As-Built Compliance Checklist + EnerGuide Label + Homeowner Information Sheet, Rebate Submissions |
Working with a Registered Energy Advisor ensures that your project meets BC’s energy performance targets, and that you have clear documentation every step of the way.
Why It Matters
The Step Code process isn’t just about passing a test. It’s about:
- Building a more comfortable, healthy, and durable home
- Reducing long-term operational & energy costs
- Accessing rebates or financing programs that require verified testing
- Reducing the energy consumption of Canada’s housing stock by building better, more efficient, and healthier homes.
- If you’re planning a new build and haven’t been through the process before, email, text or call us with your questions. We’re here to make this process straightforward and easy for everyone.
For BC Government information on BC Energy Step Code – see here.
Email: brett@thriveenergyinc.com
Website: www.thriveenergyinc.com
