If you live in the Okanagan Valley and you’ve seen neighbours radon testing that comes back “all clear,” you might be thinking you’re safe – why bother testing your home. But here’s the thing: your home could still have elevated radon levels even if every house on your street tested fine. Radon testing in the Okanagan is more important than most homeowners realize.
Let’s get into: what radon is, why your house is the only one that matters, the real risks of exposure, when levels tend to be higher in our region, how much mitigation costs, and how to move forward.
What is Radon and Why It Matters
Radon is a radioactive gas produced by the natural breakdown of uranium in soil and rock. It’s invisible, odourless, tasteless and denser than air so it tends to concentrate in basements and crawl spaces. Over long-term exposure, radon is linked to lung cancer.
Radon exposure is the second-leading cause of lung cancer in Canada after smoking. That’s huge.
You can’t sense it, and you can’t predict it. The only way to know what’s happening in your home is to test it. Testing kits are easily available from amazon.(not an affiliate link).
Why Your Home Could Be at Risk Even if Your Neighbours Aren’t
Radon levels vary significantly from home to home. Even houses next door can show very different results because of differences in soil, foundation type, ventilation, construction type and air pressure.
Your neighbour’s test result doesn’t guarantee yours. When someone says “my neighbour’s house was fine, so ours should be too” it’s not nearly a safe assumption. Every home needs its own test.
More so all the time with the recommendations to air-seal homes to save energy and improve home efficiency, well-meaning people are sealing toxic gases into their breathing space. Air-sealing a home is an excellent idea on many parameters but adequate ventilation needs to be assessed and radon absolutely must be tested for first.
What Level of Radon is Safe?
Health Canada’s guideline for radon in homes is 200 Bq/m³ (becquerels per cubic metre). If your home’s average level is higher, mitigation is recommended within two years. If it’s above 600 Bq/m³, you should act within one year.
On a personal note, we tested our home in West Kelowna after living in it for 6 years and found results of 650 Bq/m³ over a 3 month average. We immediately had 3 companies in to give quotes for mitigation and had the installation completed before the next heating season, as soon as the company could fit us in. The home was built in 2010 and wasn’t required by building code to have any sort of radon mitigation system installed at that time.
I’ve also personally seen results of over 1500 Bq/m³ in a number of Kelowna homes.
There’s no truly safe level of radon. The lower, the better. In some parts of BC, as many as one in five homes test above 200 Bq/m³. Testing is the only way to know where your home stands.
Radon requirements for homes in BC over time
2012 BC Building Code: Introduced the first radon provisions, requiring a capped pipe “rough-in” for a subfloor depressurization system in all residential buildings.
2014 BC Building Code: Updated the requirement to mandate the installation of a full soil depressurization system in specific regions deemed to have higher radon risk.
2024 BC Building Code: Eliminated the previous regional exemptions, mandating passive radon rough-ins for subfloor depressurization systems in all new residential construction across the province.
Homes built in BC before 2012 had no requirements in regards to radon.
When Radon Levels Are Likely to Be Higher
Radon enters from the soil and tends to accumulate indoors, especially during colder months when windows are closed and homes are sealed tightly. In the Okanagan, winter is the time when radon levels are usually at their highest.
That’s why long-term testing – at least 90 days during the heating season – is the best way to get an accurate reading. Short-term summer tests can give misleadingly low results and lead homeowners to believe that their levels are healthy, when they’re actually being exposed to unsafe levels of radon through the heating season annually.
How to Do Radon Testing in Your Okanagan Home
Testing your home is simple. You can buy a do-it-yourself test kit or hire a certified professional. Some municipalities will offer kits for free to homeowners and send the kits out for testing.
If budget is a primary consideration, check online to see if this is an option through your municipality or regional district. Local libraries offer test kits on loan as well – see here.
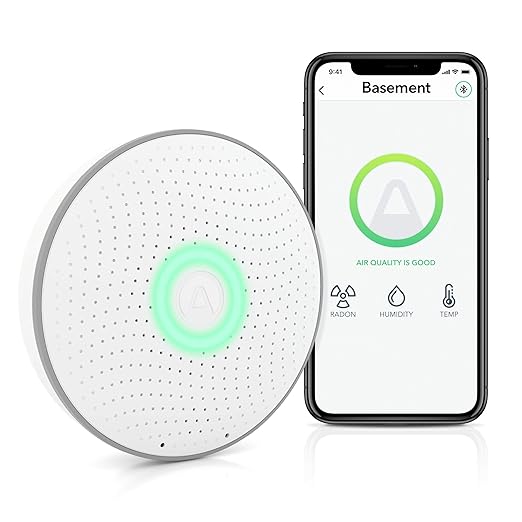
If budget is not having to be the top consideration, I would recommend ordering a digital monitor through somewhere like Amazon that’s easy to read and monitor at home.
Our home went untested a long time because we thought we would wait for a free kit through the City of West Kelowna and kept finding this service fully subscribed. It isn’t worth waiting – we should have tested sooner because our levels were highly concerning when we finally did test.
- Long-term testing: Use a radon detector for 90 days or more. Place it in the lowest lived-in area of your home (like the basement).
- Normal living conditions: Keep your windows and doors used as usual during the test period.
- Send for analysis: At the end of the test, send the detector to the lab listed in the kit for analysis, if required by the test. (Digital monitors will hook up to an app on your phone and give you real-time results).
What to Do if Your Home Tests High
If your radon level is over 200 Bq/m³, it’s time to look into mitigation. Certified contractors can install systems that vent radon from beneath your home to the outdoors, which usually brings levels down quickly.
Typical mitigation systems usually cost between $1,500 and $8,000, depending on the home’s design and process required for mitigation. After installation, a follow-up test confirms the results are at a healthy level. Make sure your installer is doing post-install radon testing to ensure the expected results.
It’s a good idea to get 3 or more quotes from mitigation companies to see what options different companies will recommend and what sort of due-diligence they perform before recommending a path forward.
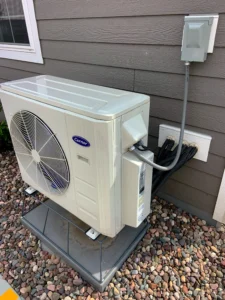
Sometimes levels are so slightly over the 200 Bq/m³ threshold that a simple solution like added ventilation through an HRV is enough to resolve the issue and even-out the pressure in the home so radon isn’t being pulled in from under the foundation. This can be a relatively minimal cost.
Alternatively, when active soil depressurization is the best approach, this will be a more expensive undertaking and require more invasive installation.
Smaller steps, like sealing cracks and improving ventilation, can help, but a full mitigation system is the most reliable way to reduce radon levels long-term.
Our home’s levels were so considerable that we needed to have active soil depressurization performed and had 3 businesses in to quote the project.
Our experience with radon mitigation
One contractor came in, spent 10 minutes and looked at almost nothing. He recommended a quick solution for $3000, and when asked, said he didn’t plan to complete any follow-up testing to confirm results afterwards. We did not consider this company as it felt too important to make sure the mitigation was done correctly and thoroughly.
The next contractor was much more thorough, assessed the house fairly thoroughly and spent time discussing his recommendation with us. His quote came in at $4500. We did consider this quote head to head with the third company who quoted out the job.
The last company who came in to quote the job did charge for their initial assessment (I believe it was $75) but also spent over an hour on-site doing testing and exploring different options and expected results from each. The recommendation was to drill into the basement slab on all corners, provide pressure equalization throughout the foundation and to actively depressurize under the slab with a continous fan and venting through the side of the house. This quote came in at $6500.
If we were considering something less critical to the health of our entire family, we might have weighed the financial aspect a bit more between the quotes but when it came to eliminating toxic gas from the home, we really wanted to ensure a healthy outcome so we chose the last company.
Why This Matters for Okanagan Homeowners
Radon risk isn’t something you can judge by neighbourhood, city, or even street. Every home’s soil, construction, and airflow are different. Testing is the only thing that will give real answers.
Knowing your numbers also helps protect your investment. Many buyers in the Okanagan now ask for radon test results or mitigation information during the purchase process.
Local Companies That Provide Radon Testing and Mitigation
Here are a few certified companies serving the Okanagan region:
Final Thoughts
Testing for radon can be easy, affordable, and is one of the simplest steps you can take to protect your home and your health. Don’t rely on your neighbour’s results – every home is different.
While testing is relatively affordable, mitigation may not be and this is a concern in particular at a time when most homeowners are feeling the pinch of the current economy. I wish I had tips to offer here, but regardless of finances, knowledge is power and if you know your home’s radon levels are unsafe but the cost of mitigation isn’t in the cards right now, maybe solutions like cracking windows and wearing extra layers are where things land.
Radon exposure is the second leading cause of lung cancer in Canada for a reason – people aren’t often enough talked to about it, or testing their homes for it.
If you have questions about radon that we didn’t answer here – reach out – we’ll do our best to answer them or find the right person who can.